Defining a Map from Imported
Data
Overview
This is probably the easiest and most accurate method of generating
a map. GenesisII can import the following data types:
In addition some other file formats, such as Japanese SEM files, may be converted to XYZ format before importing. See the Utilities directory on the CD-ROM for details of available programs for doing this.
Import
The procedure for importing data differs in detail according to the
source file being used. However, in general the steps are:

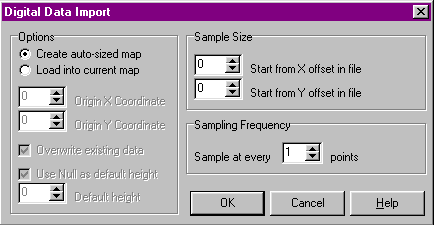
Depending on the type of data source to be used an Import Parameters dialog box may be displayed. This is described in more detail in the sections on specific import source types. Set any required parameters and click on OK. The data is then imported and displayed on the map canvas. Once displayed imported data is handled in exactly the same way as directly enter data. You will probably want to add terrain information or possibly edit the imported heights data.
In most cases you will let GenesisII create a map of the correct size and grid point spacing using the data from the import file. Sometimes however it is desirable to import into a previously defined map (particularly with USGS DEM files as the large sizes of these gives slow response times).